PROCESS
I knew that I wanted to make the chair red, so I began looking for red leather textures online. When I found the texture I liked, I took it into Photoshop and raised the image's contrast and darkened the colors so that the texture was not just solid bright red. I also raised the contrast so that I could use bump mapping techniques to make the texture look even more three-dimensional when it was made into a material. For the texture on the legs, I found a wood texture and raised the contrast and darkened it as well.
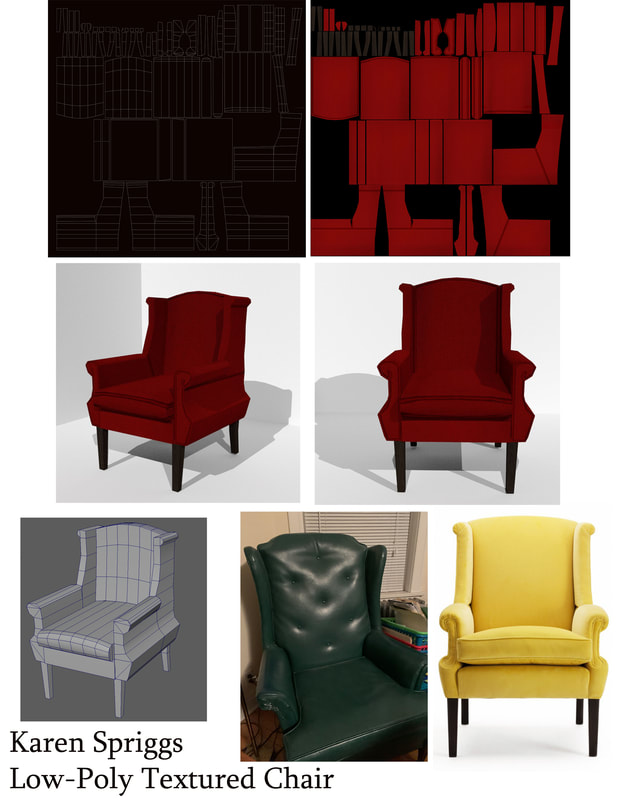
When making a low-poly version of the model from the previous assignment, I made some improvements in terms of the model's geometry. I used the connect tool to create new edges between vertices in order to split up faces that had too many sides into smaller ones with three or four sides. I was also able to have each side of the chair be its own whole shape, as I made better use of the extrude tool in order to create the armrests from the sides themselves. I believe that the overall shape and proportion of the newer model matched that of the reference image, so overall I am proud of how much better the new iteration of the model is.
I used the automatic UV mapping tool in order to create the UV layout, and took a snapshot of it that was 4096 x 4096 pixels so I could include high resolution detail on each of the faces. Once I had placed the red leather texture and the wood texture on the appropriate faces, I began to place the seams on different parts of the layout. The placement of the seams was referenced from a chair in my living room, and after each seam was placed I would load the texture in Maya to check to see if it looked right. If it did not, I would resize or move the seam so that it looked correct. Once I had all of the seams placed, I was happy that they all seemed properly placed since it was a lot of going back and forth to test the texture after each little adjustment.
PRESENTATION SHEET